1.UE编辑器中开启插件和设置
在UE5后新增了增强输入系统,下面是在C++中的使用方法。演示的版本是5.11.
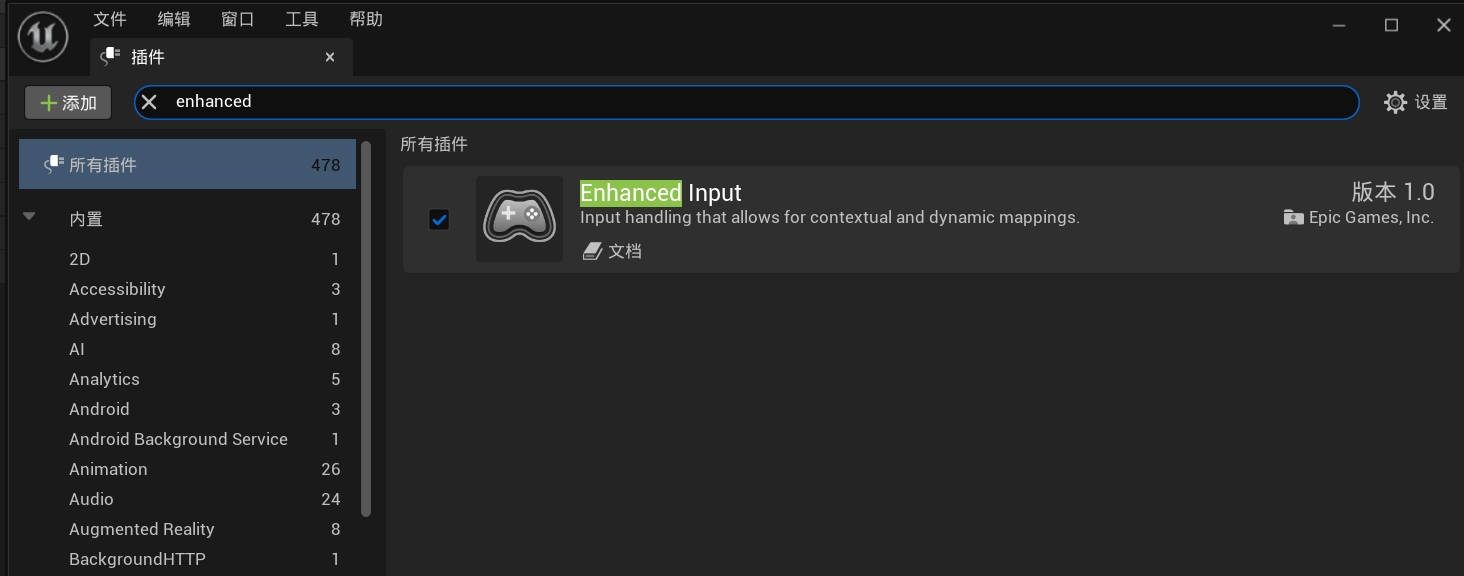
在插件中确保增强输入是开启的,5.1后默认开启。

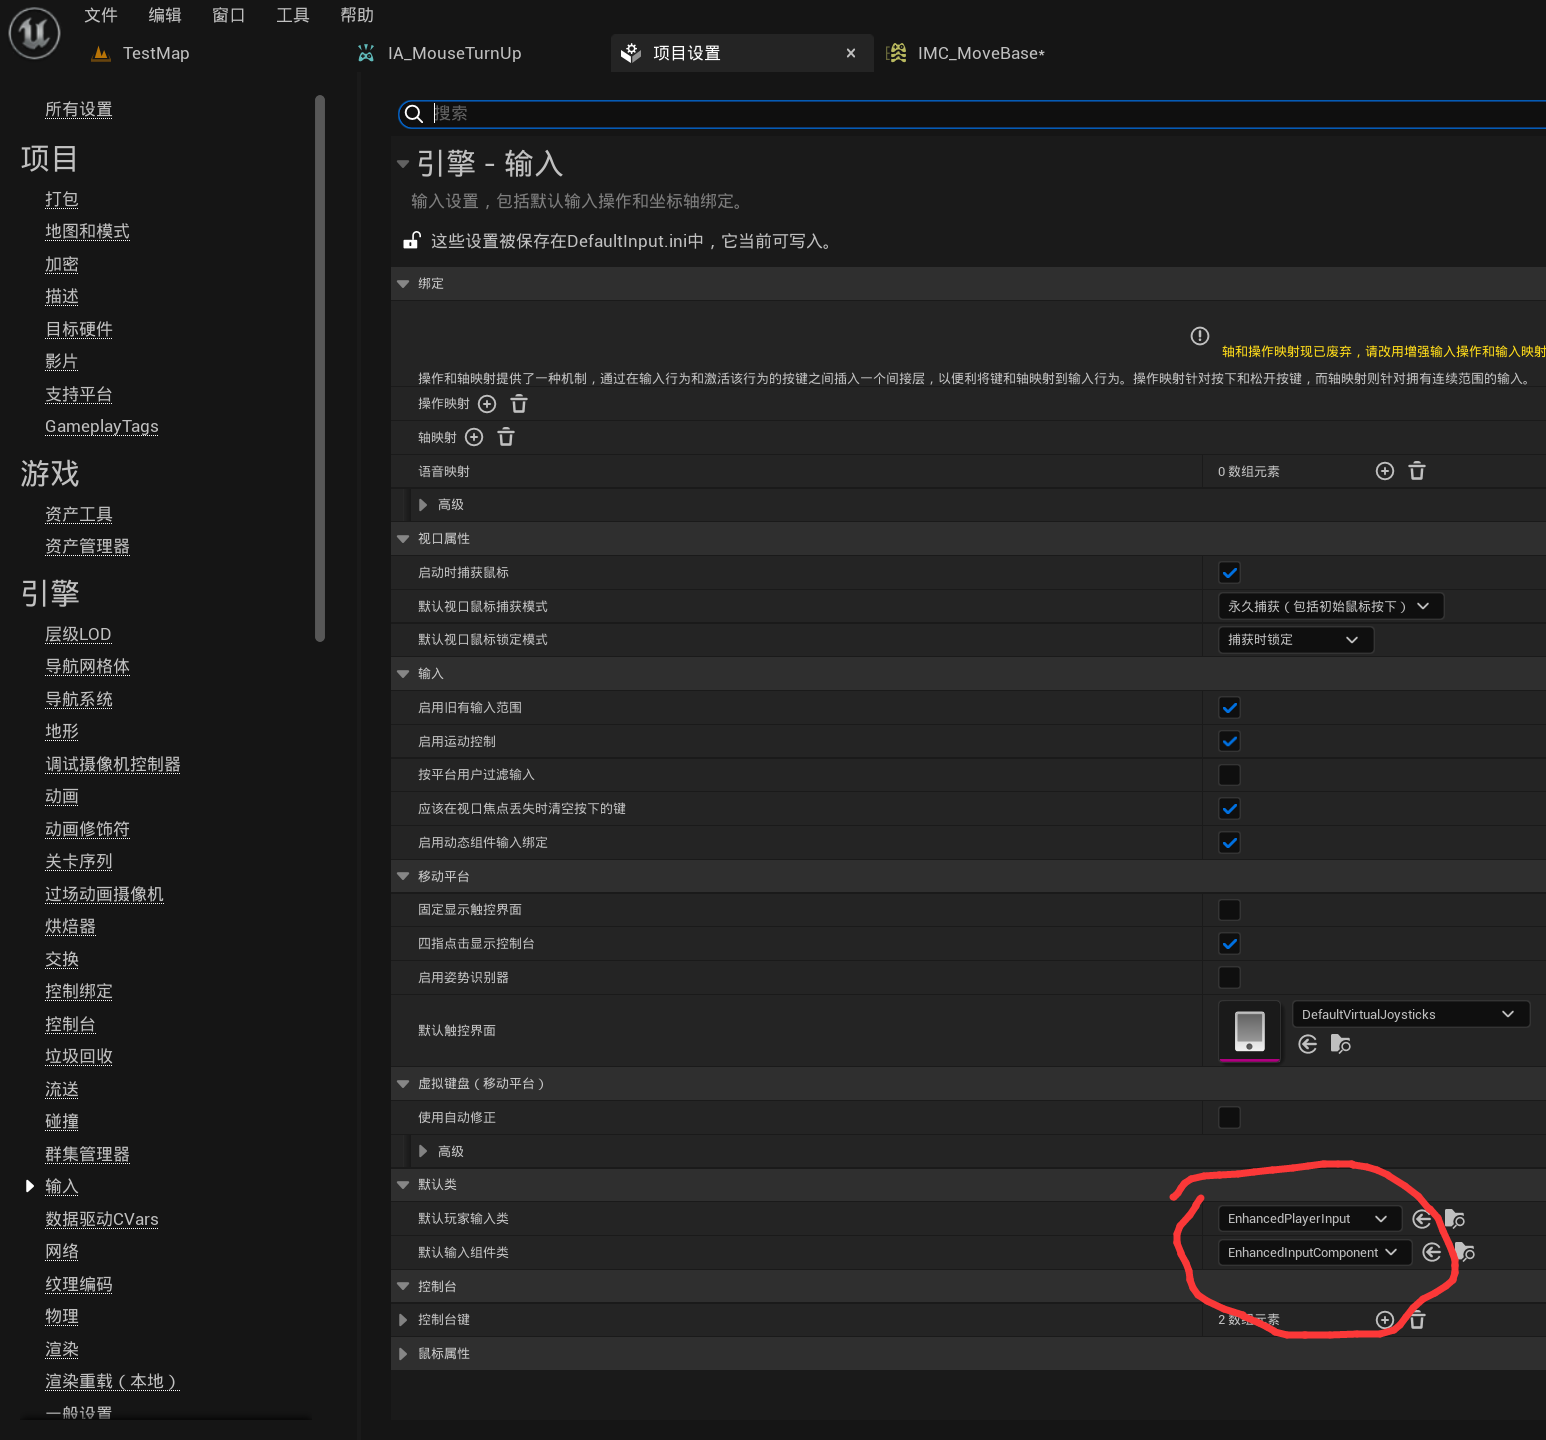
在项目设置中输入里,确保默认为这两项,5.1后默认为这两项。

2.创建增强操作文件
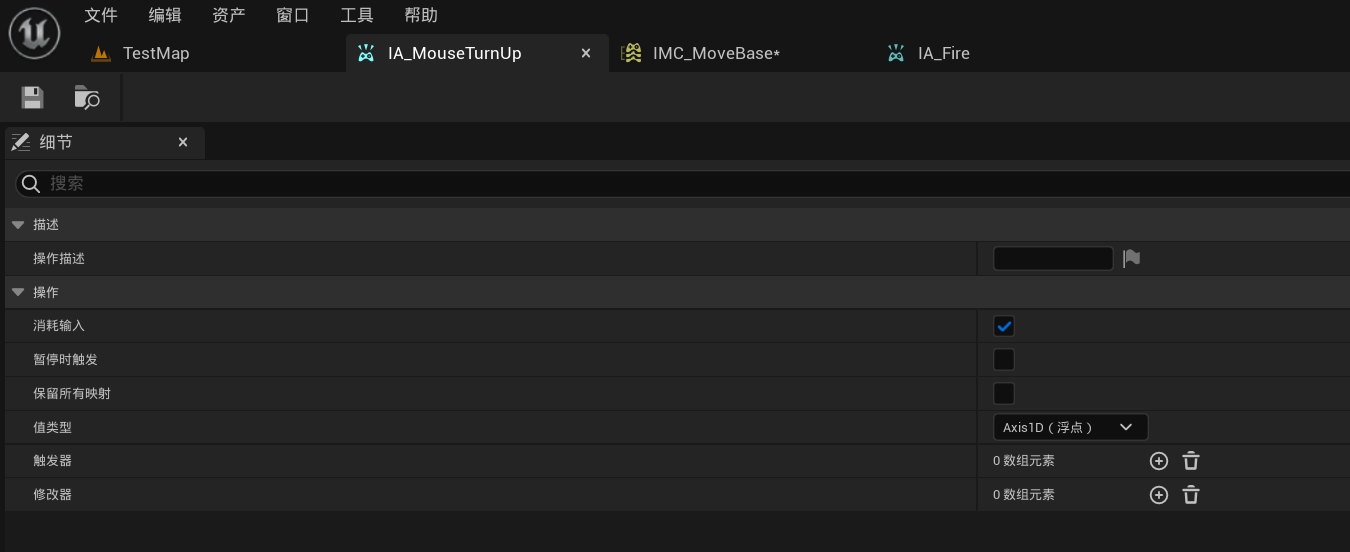
我们创建一个input文件夹单独存放文件。这里设置了开火,跳跃,视角左右旋转,视角上下旋转,位置左右移动,位置前后移动这几个基础输入操作。


开火,跳跃等action操作值类型可设为布尔。


旋转视角,移动位置等设置值类型为Axios1D。

之后是输入映射文件。按图中说明对应操作。此处为轴映射操作。
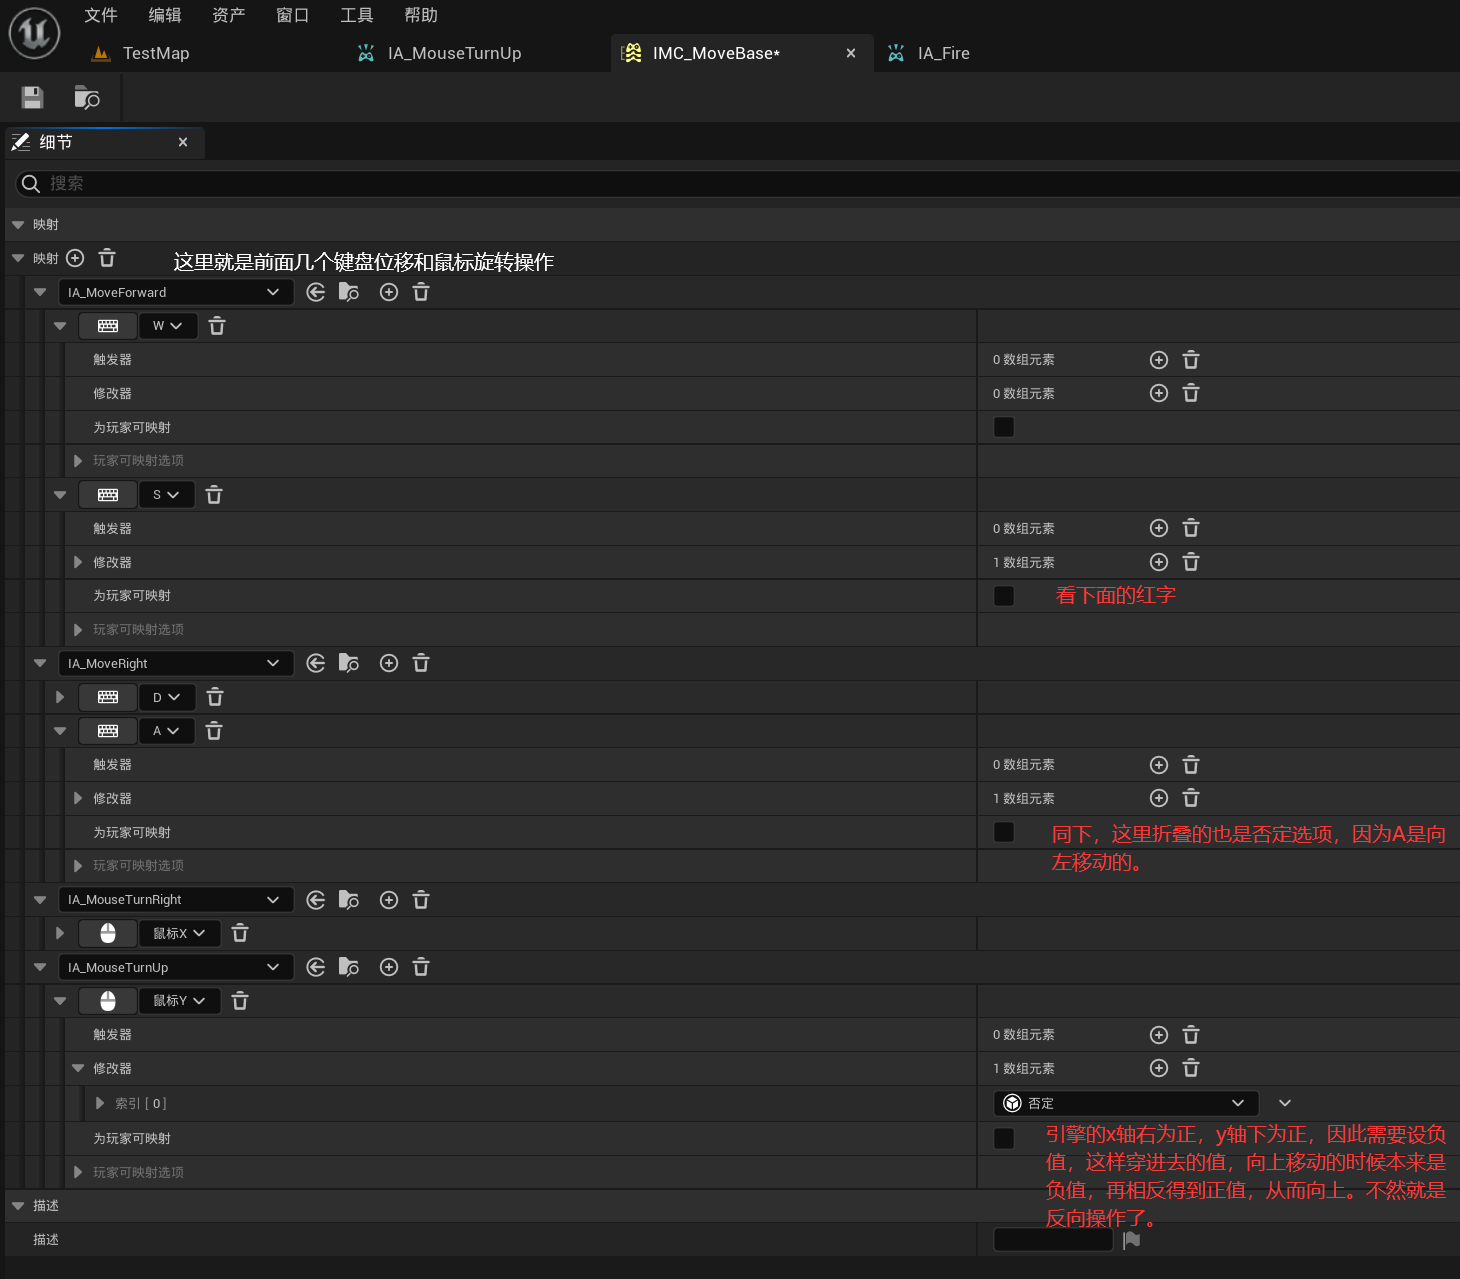

接下来是动作映射。可以看到里面的触发器有很多种触发方式,选择你需要的。
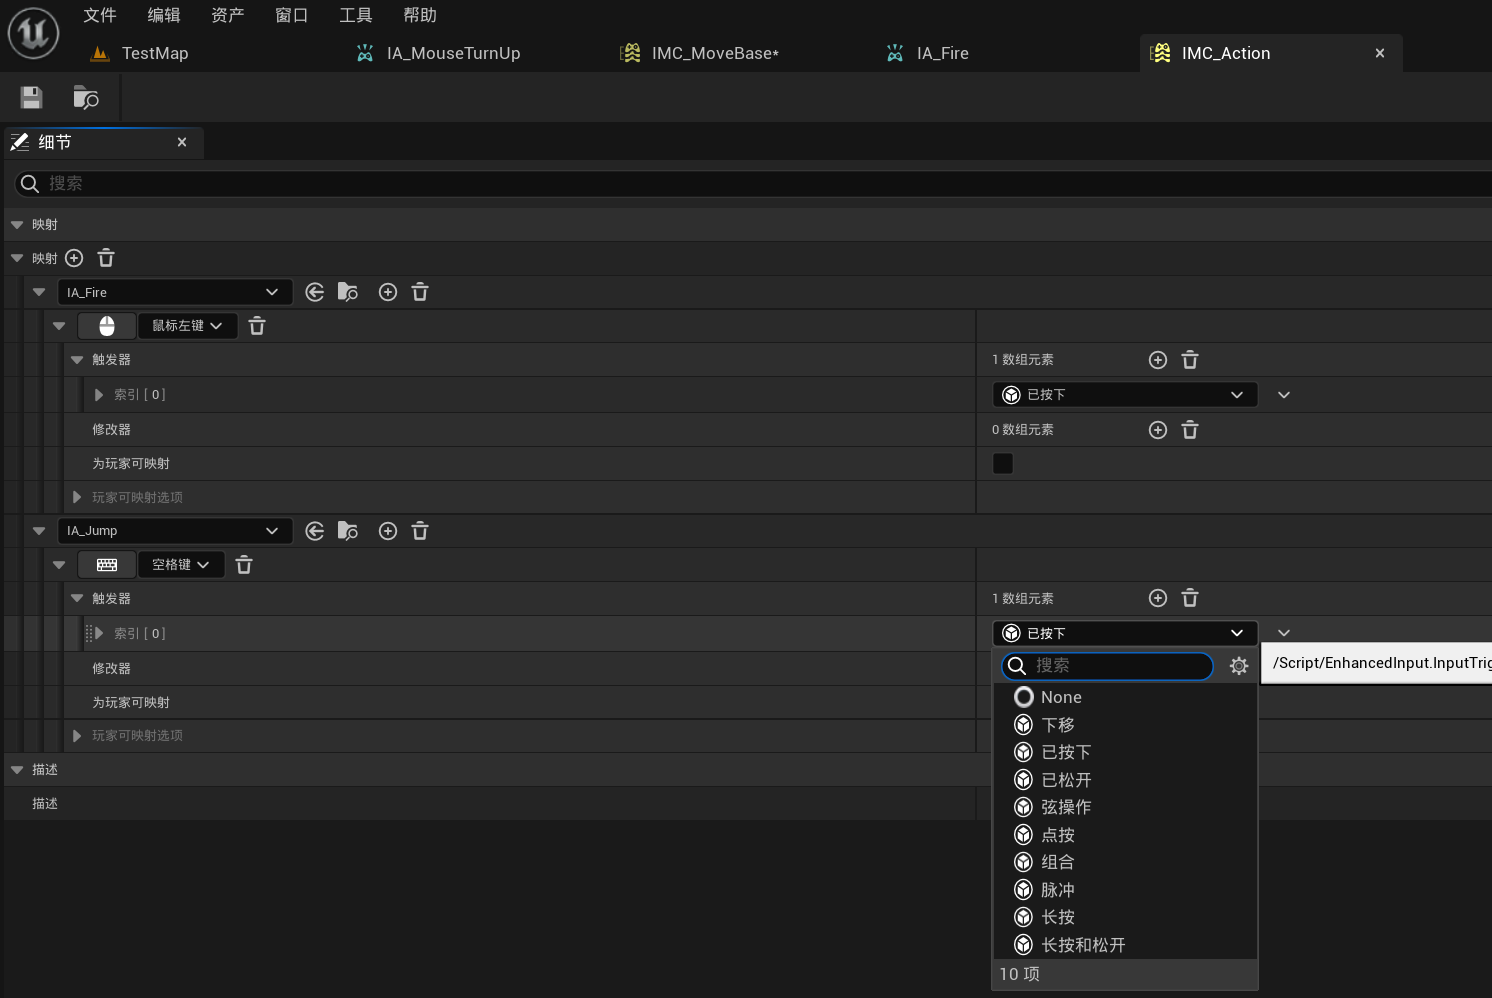

此时蓝图中的设置就完成了。
3.C++的绑定
1. .h
肯定是写在character里,我用到的头文件
1
2
3
4
5
6
7
| #include "CoreMinimal.h"
#include "GameFramework/Character.h"
#include "EnhancedInputComponent.h"
#include "InputMappingContext.h"
#include"InputActionValue.h"
#include "Camera/CameraComponent.h"
#include "FPSBaseCharacter.generated.h"
|
各种映射写在了private里,然后用meta宏反射给引擎去读取。
1
2
3
4
5
6
7
8
9
10
11
12
13
14
15
16
17
18
19
20
21
22
23
24
25
26
27
28
29
30
31
32
33
34
35
36
|
UPROPERTY(EditAnywhere,BlueprintReadWrite, Category = "EnhancedInput | Context",meta = (AllowPrivateAccess = "true"))
TObjectPtr<UInputMappingContext> IMC_Action;
UPROPERTY(EditAnywhere,BlueprintReadWrite, Category = "EnhancedInput | Context", meta = (AllowPrivateAccess = "true"))
TObjectPtr<UInputMappingContext> IMC_MoveBase;
UPROPERTY(EditAnywhere, BlueprintReadWrite ,Category = "EnhancedInput | Action", meta = (AllowPrivateAccess = "true"))
TObjectPtr<UInputAction> IA_MoveForward;
UPROPERTY(EditAnywhere, BlueprintReadWrite, Category = "EnhancedInput | Action", meta = (AllowPrivateAccess = "true"))
TObjectPtr<UInputAction> IA_MoveRight;
UPROPERTY(EditAnywhere, BlueprintReadWrite, Category = "EnhancedInput | Action", meta = (AllowPrivateAccess = "true"))
TObjectPtr<UInputAction> IA_LookUpRate;
UPROPERTY(EditAnywhere, BlueprintReadWrite, Category = "EnhancedInput | Action", meta = (AllowPrivateAccess = "true"))
TObjectPtr<UInputAction> IA_LookRightRate;
UPROPERTY(EditAnywhere, BlueprintReadWrite, Category = "EnhancedInput | Action", meta = (AllowPrivateAccess = "true"))
TObjectPtr<UInputAction> IA_Jump;
UPROPERTY(EditAnywhere, BlueprintReadWrite, Category = "EnhancedInput | Action", meta = (AllowPrivateAccess = "true"))
TObjectPtr<UInputAction> IA_Fire;
UPROPERTY(EditAnywhere, Category = "Input")
float TurnRateGamepad = 5.f;
|
要绑定的函数写在了protected里
1
2
3
4
5
6
7
8
9
10
11
12
13
14
15
|
void MoveForward(const FInputActionValue& InputValue);
void MoveRight(const FInputActionValue& InputValue);
void LookRightRate(const FInputActionValue& InputValue);
void LookUpRate(const FInputActionValue& InputValue);
void OnJump(const FInputActionValue& InputValue);
void OnJumpStoping(const FInputActionValue& InputValue);
void Fire(const FInputActionValue& InputValue);
|
2. .cpp
重点在SetupPlayerInputComponent函数中
1
2
3
4
5
6
7
8
9
10
11
12
13
14
15
16
17
18
19
20
21
22
23
24
25
26
27
28
29
30
31
32
33
34
35
36
37
38
39
| void AFPSBaseCharacter::SetupPlayerInputComponent(UInputComponent* PlayerInputComponent)
{
Super::SetupPlayerInputComponent(PlayerInputComponent);
bUseControllerRotationPitch = true;
bUseControllerRotationYaw = true;
if(APlayerController * PC = Cast<APlayerController>(GetController()))
{
if(UEnhancedInputLocalPlayerSubsystem* Subsystem = ULocalPlayer::GetSubsystem<UEnhancedInputLocalPlayerSubsystem>(PC->GetLocalPlayer()) )
{
Subsystem->AddMappingContext(IMC_Action, 0);
Subsystem->AddMappingContext(IMC_MoveBase, 0);
}
}
UEnhancedInputComponent* EnhancedInputComponent = Cast<UEnhancedInputComponent>(PlayerInputComponent);
if(EnhancedInputComponent)
{
EnhancedInputComponent->BindAction(IA_MoveForward, ETriggerEvent::Triggered, this, &AFPSBaseCharacter::MoveForward);
EnhancedInputComponent->BindAction(IA_MoveRight, ETriggerEvent::Triggered, this, &AFPSBaseCharacter::MoveRight);
EnhancedInputComponent->BindAction(IA_LookRightRate, ETriggerEvent::Triggered, this, &AFPSBaseCharacter::LookRightRate);
EnhancedInputComponent->BindAction(IA_LookUpRate, ETriggerEvent::Triggered, this, &AFPSBaseCharacter::LookUpRate);
EnhancedInputComponent->BindAction(IA_Jump, ETriggerEvent::Started, this, &AFPSBaseCharacter::OnJump);
EnhancedInputComponent->BindAction(IA_Jump, ETriggerEvent::Completed, this, &AFPSBaseCharacter::OnJumpStoping);
EnhancedInputComponent->BindAction(IA_Fire, ETriggerEvent::Triggered, this, &AFPSBaseCharacter::Fire);
}
}
|
接下来是几个回调函数的实现,玩家在键盘上的操作从键盘到这,这再传给下面的回调函数,回调函数再操作角色本身。
1
2
3
4
5
6
7
8
9
10
11
12
13
14
15
16
17
18
19
20
21
22
23
24
25
26
27
28
29
30
31
32
33
34
35
36
37
38
39
40
41
42
43
44
45
46
47
48
49
50
51
52
53
54
| void AFPSBaseCharacter::MoveForward(const FInputActionValue& InputValue)
{
float value = InputValue.GetMagnitude();
if((Controller != nullptr) && (value!= 0.f))
{
const FRotator Rotation = Controller->GetControlRotation();
const FRotator YawRotation(0, Rotation.Yaw, 0);
const FVector Direction = FRotationMatrix(YawRotation).GetUnitAxis(EAxis::X);
AddMovementInput(Direction, value);
}
}
void AFPSBaseCharacter::MoveRight(const FInputActionValue& InputValue)
{
float value = InputValue.GetMagnitude();
if(Controller != nullptr && value != 0.f)
{
const FRotator Rotation = Controller->GetControlRotation();
const FRotator YawRotation(0, Rotation.Yaw, 0);
const FVector Direction = FRotationMatrix(YawRotation).GetUnitAxis(EAxis::Y);
AddMovementInput(Direction, value);
}
}
void AFPSBaseCharacter::LookRightRate(const FInputActionValue& InputValue)
{
AddControllerYawInput(InputValue.GetMagnitude() * TurnRateGamepad * GetWorld()->GetDeltaSeconds());
}
void AFPSBaseCharacter::LookUpRate(const FInputActionValue& InputValue)
{
AddControllerPitchInput(InputValue.GetMagnitude() * TurnRateGamepad * GetWorld()->GetDeltaSeconds());
}
void AFPSBaseCharacter::OnJump(const FInputActionValue& InputValue)
{
FString Message = FString::SanitizeFloat(1);
if (GEngine)
{
GEngine->AddOnScreenDebugMessage(
-1,
60,
FColor::Red,
Message
);
}
}
|
4.角色中设置
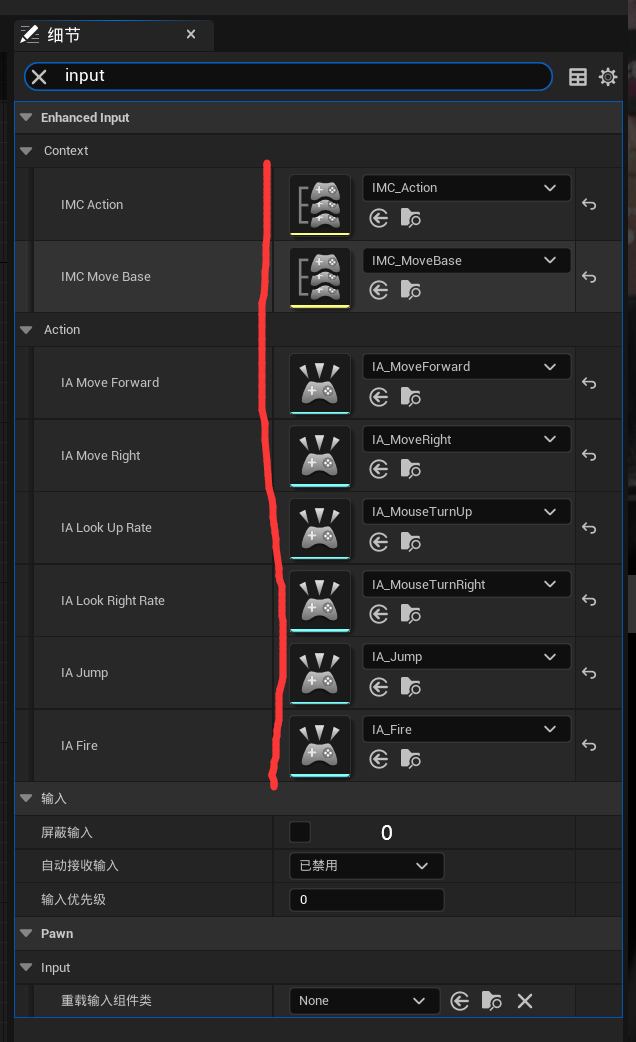

该设置的设置完,自动接收输入设为0,然后就可以在场景中用了。搜pad可以调鼠标灵敏度的属性。